Barney
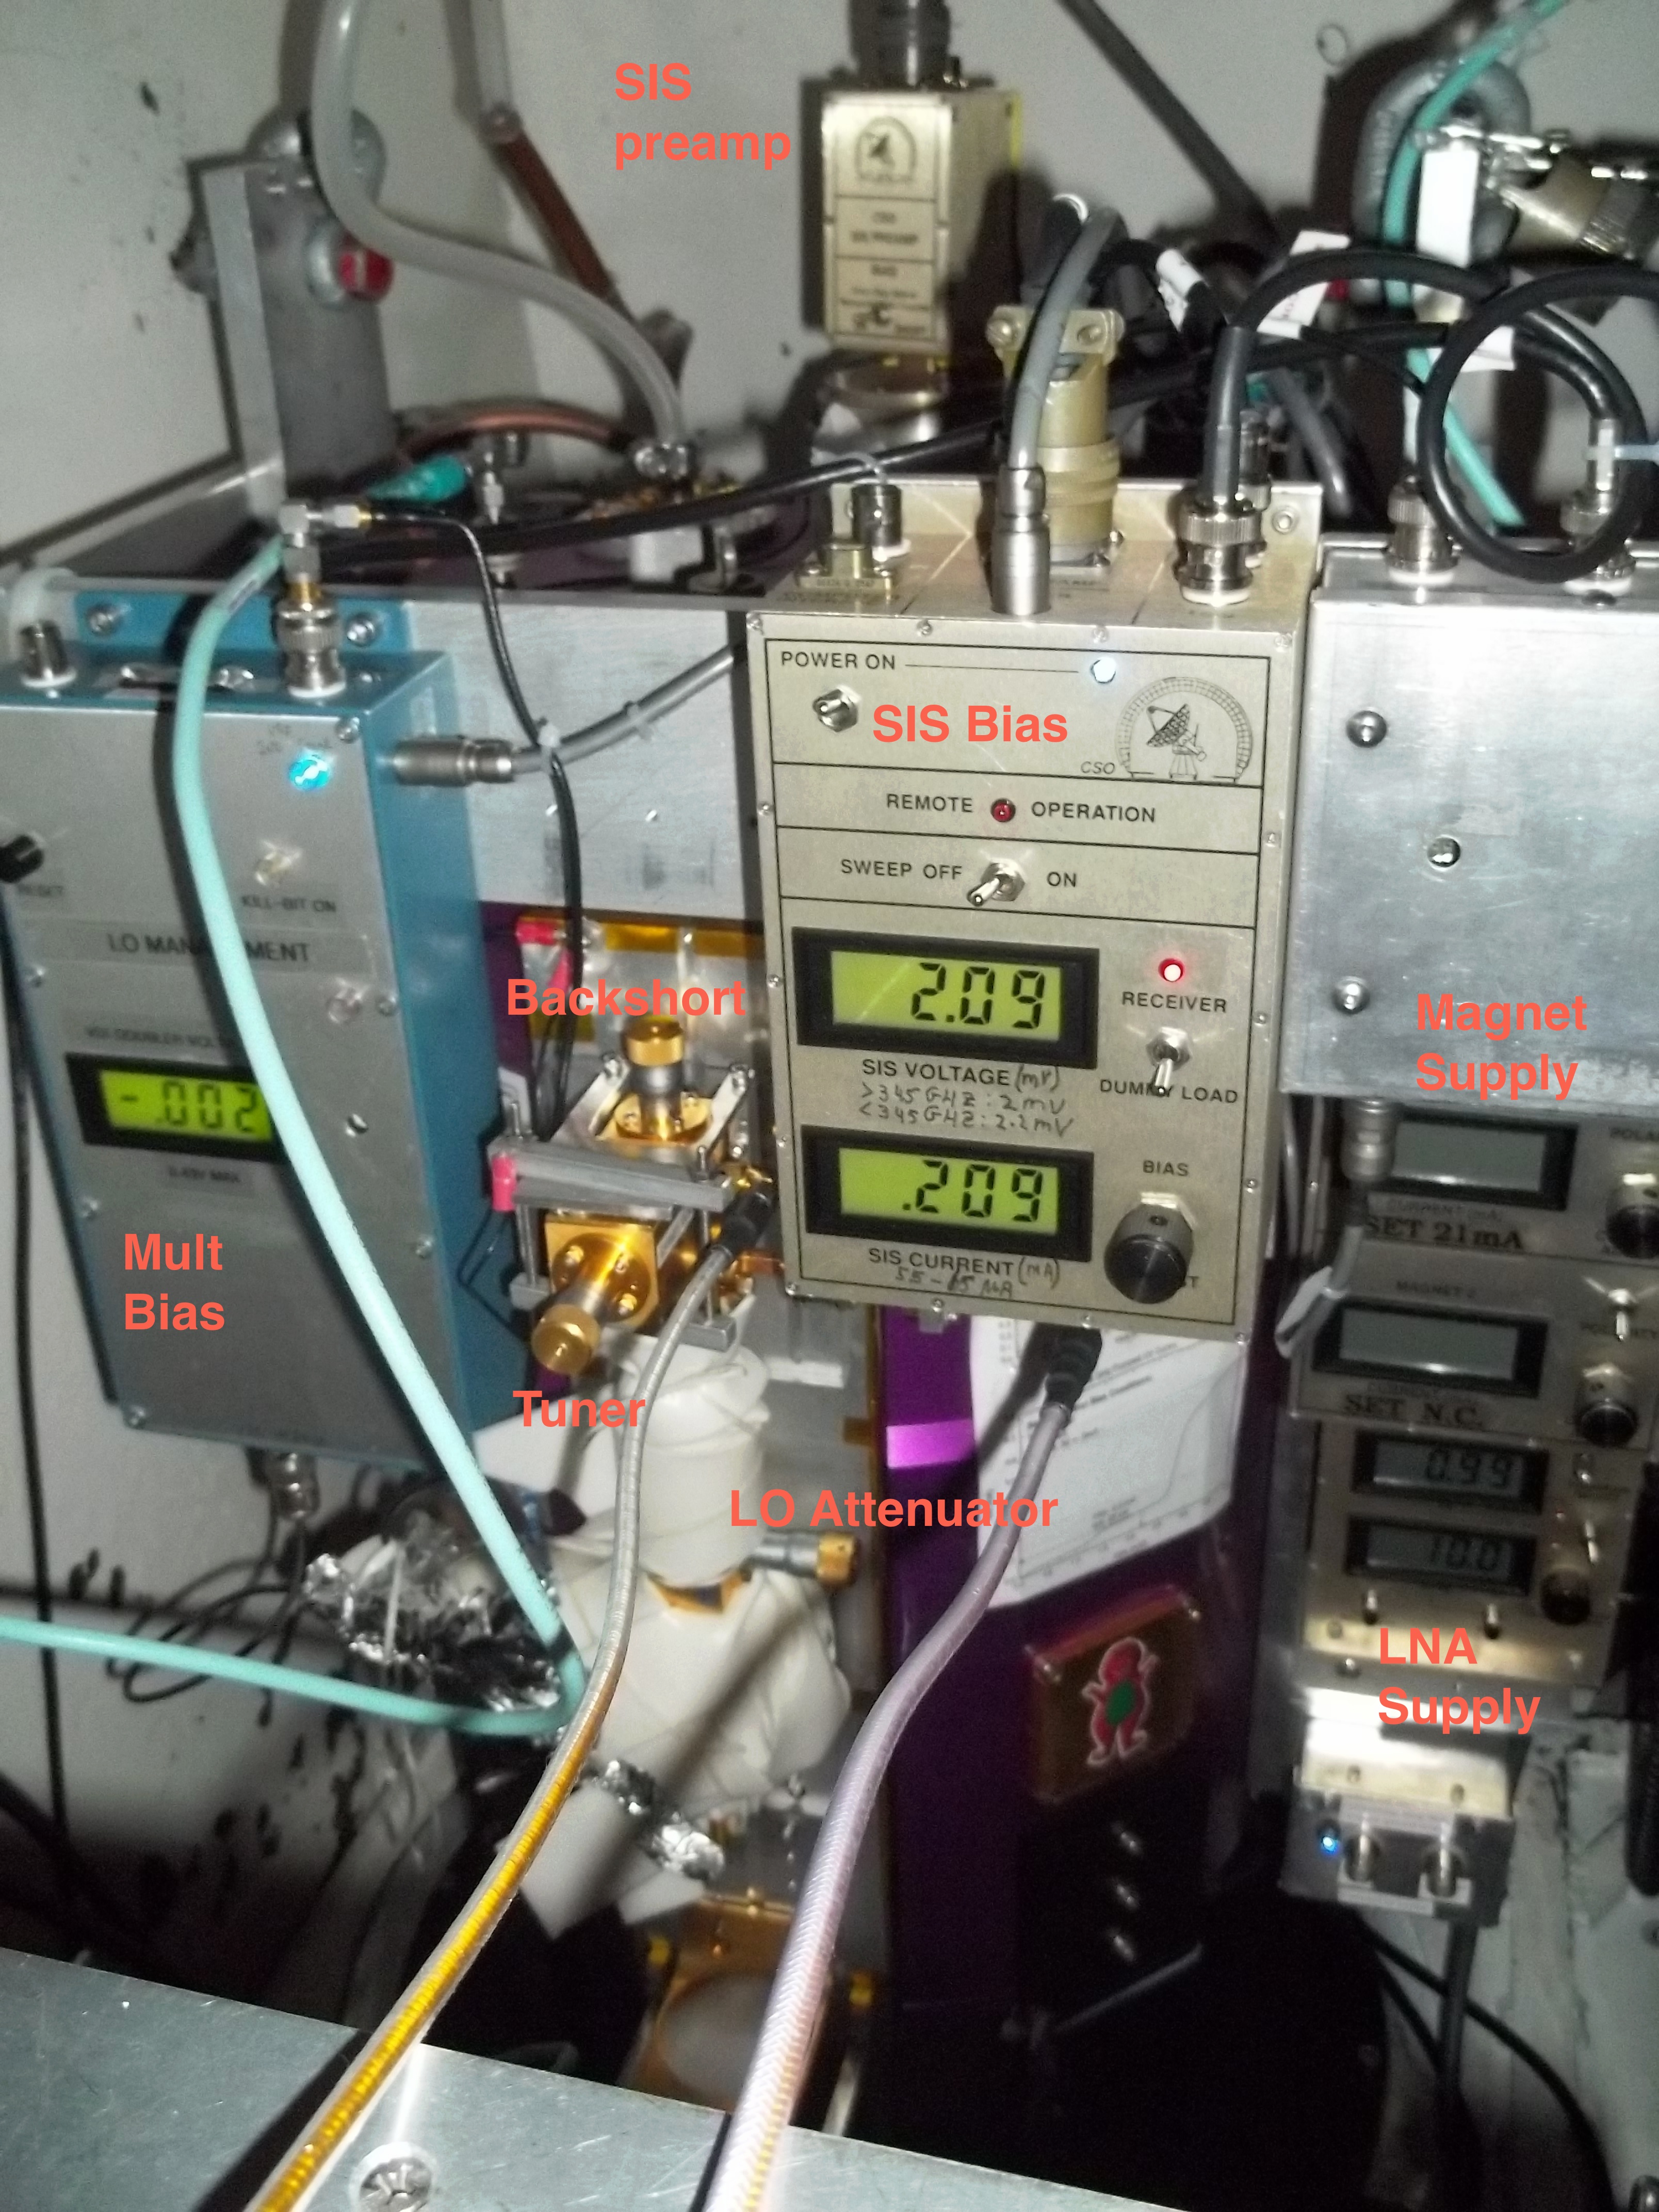
The wideband 345 GHz receiver (Barney) has a 4 GHz bandwidth (4-8 GHz IF). It is mounted on request at the Cassegrain focus, usually on the left side.
Setup
Always wear a grounding wrist strap while adjusting the receiver.
- Remove the mirror covers from the relay optics.
- Manually rotate the tertiary mirror on the relay optics so it points to Barney.
- Select the receiver.
UIP> instrument rx345x- If necessary, move the telescope tertiary mirror out of the way.
UIP> tertiary /cassegrain - If necessary, Specifiy the pointing file.
UIP> pointing barney_cass
- Position the telescope for easy access.
UIP> za 55 - Turn on the receiver.
- Turn on the LNA power supply (lower right). The displays should read 0.99 V and 10 mA.
- Turn on the magnet power supply (middle right). Adjust the current to 21 mA.
- Turn on the SIS bias supply (upper right). Set to Dummy Load. The red light should illuminate. Set the voltage to 0 V.
- Locate the small SIS preamplifier box on top of the cryostat. Move the switch from Short to On.
- On the blue multiplier bias box (right side), if the Kill Bit light is illuminated, push the button to reset.
Tuning
- Close the LO attenuator. Turn it fully CCW but don't drive it hard into the stop.
- Specify the line, for example:
UIP> lo 12co3-2 /side up /if 5.5 /receiver rx345x /force - Note the Gunn oscillator (
F Lock) frequency on the antenna monitor (85 GHz for this example). - Run the PLL control program to check the Gunn oscillator and the PLL are turned on:
ssh cso@hau(password in control room)
$ csopll
> gunn
This displays the Gunn and PLL status. If the Gunn or the PLL are off:
> gunn on
> pll on - Look up the Gunn frequency on the tuning sheet and set the tuning and backshort micrometers accordingly. The tuning micrometer sticks out the small end of the oscillator. The backshort is on the long side.
- Lock the PLL. Make small adjustments to the Gunn micrometers while watching the 109 MHz reference tone on the spectrum analyzer. When the PLL locks, the amplitude will increase substantially. On the PLL box, the green light will usually illuminate.
- Switch the SIS bias box from Dummy Load to Receiver. The red light will go out.
- Set the SIS bias voltage to 2.1 mV.
- Open the LO attenuator. Turn it slowly CW until the SIS current is 0.065 - 0.080 mA.
- Measure the receiver performance.
- Measure the IF power on the power meter with an ambient load and with a cold (LN2) load in the beam.
- Calculate Y = Phot / Pcold.
- Calculate Trx = ([280 K] - Y [80 K])/ (Y - 1).
- Y = 2.6 (Trx = 45 K) is good.
- Configure spectrometers to ignore the phase lock indicator:
UIP> spec /ffts1w 5.5 /ffts2 /aos5 /lock_ignore /restart
Turn on the IF processor in the AOS5 rack if you want to use AOS5.
Shutdown
- Turn off the Gunn oscillator:
UIP> lo /off - Run the PLL control program to verify the Gunn oscillator and the PLL are turned off:
ssh cso@hau(password in control room)
$ csopll
> gunn
This displays the Gunn and PLL status. If the Gunn or the PLL are not off:
> gunn off
> pll off - Close the LO attenuator. Turn it fully CCW but don't drive it hard into the stop.
- Set the SIS bias voltage to 0 V.
- Switch the SIS bias box from Receiver to Dummy Load. The red light will illuminate.
- On the small SIS preamplifier box on top of the cryostat, move the switch from On to Short.
- Turn off the magnet power supply.
- Turn off the LNA power supply.
- Turn off the IF processor in the AOS5 rack.

